Manual Meta-Analysis
How to create a custom, manual meta-analysis.
This is a condensed adaptation of a course taught at OHBM 2023. See the course materials for a complete overview.
Neurosynth Compose provides a streamlined workflow to facilitate study selection and data extraction. You can then easily specify a high-quality manual meta-analysis and execute it in the cloud, rapidly generating results that you can inspect and share.
We will perform a slimmed down replication of the following meta-analysis: Neurobiological impact of nicotinic acetylcholine receptor agonists: An ALE meta-analysis of pharmacological neuroimaging studies.
For more guidance on how to choose a topic for meta-analysis, see the PRISMA statement and the 10 simple rules for neuroimaging meta-analyses.
Creating a new Project
Projects contain all the Steps necessary to create a new meta-analysis in Neurosynth Compose. We'll step through this process in detail.
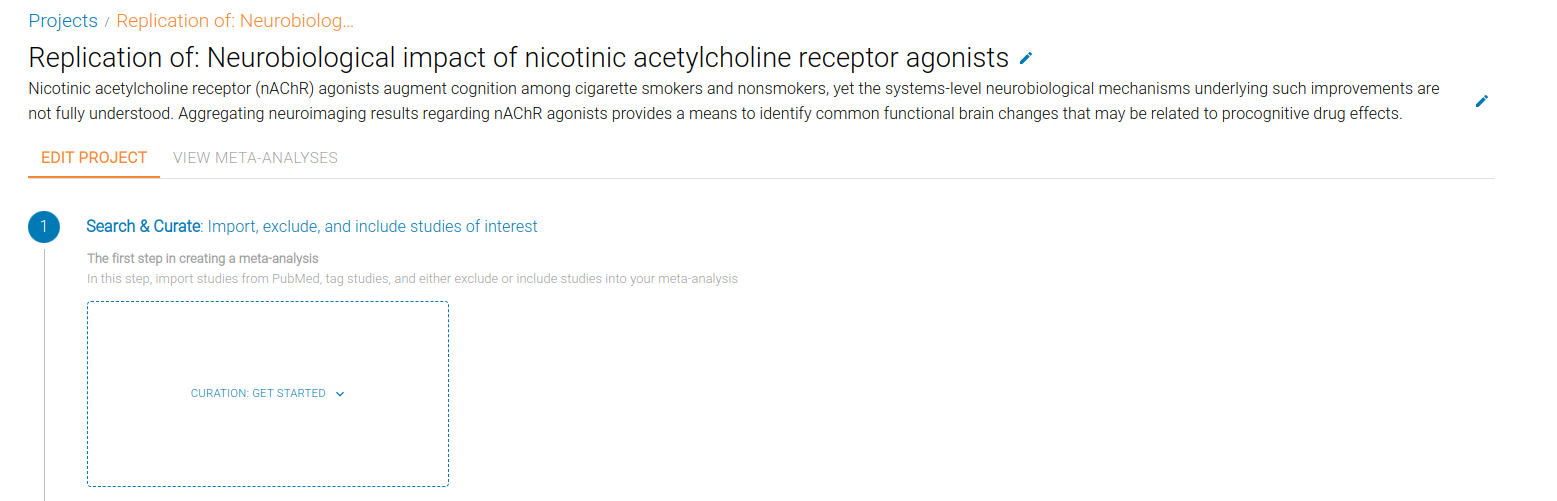
To get started, sign in, and select New Project. The default name of a new Project is "Untitled", change this to "Replication of: Neurobiological impact of nicotinic acetylcholine receptor agonists".
You'll now see the Project page, showing the three stages of a meta-analysis: Search & Curate, Extract & Annotate and Specify Meta-Analyses.
 .
.
Search & Curate
The first step in a meta-analysis is to Search for studies, and Curate these studies into a final StudySet that contains the studies we want to include in a Meta-Analysis.
To get started, we must choose a Curation workflow. There are two options: Simple and PRISMA. The main difference between these options is the number of review steps involved in creating a final list of studies. For a rigorous Manual Meta-Analysis, select "PRISMA".
Reviewers typically require Preferred Reporting Items for Systematic Reviews and Meta-Analyses (PRISMA) reporting for gold-standard meta-analyses. The PRISMA guidelines ensure a systematic selection and reporting process. However, a Simple workflow may be useful for exploratory and automated meta-analyses.
Next, you will be presented with the Curation board, consisting of four columns representing the steps of a PRISMA workflow:
Identification: Remove duplicate studies
Screening: Remove irrelevant studies
Elibility: Remove studies that do not meet inclusion criteria or do not have retrievable information
Included: Double check the studies and view which studies will be included in the meta-analysis
The overall goal is to go from a large number of studies from a broad search results, to only the studies that are relevant to your research question. These steps should be completed in order!
Importing studies
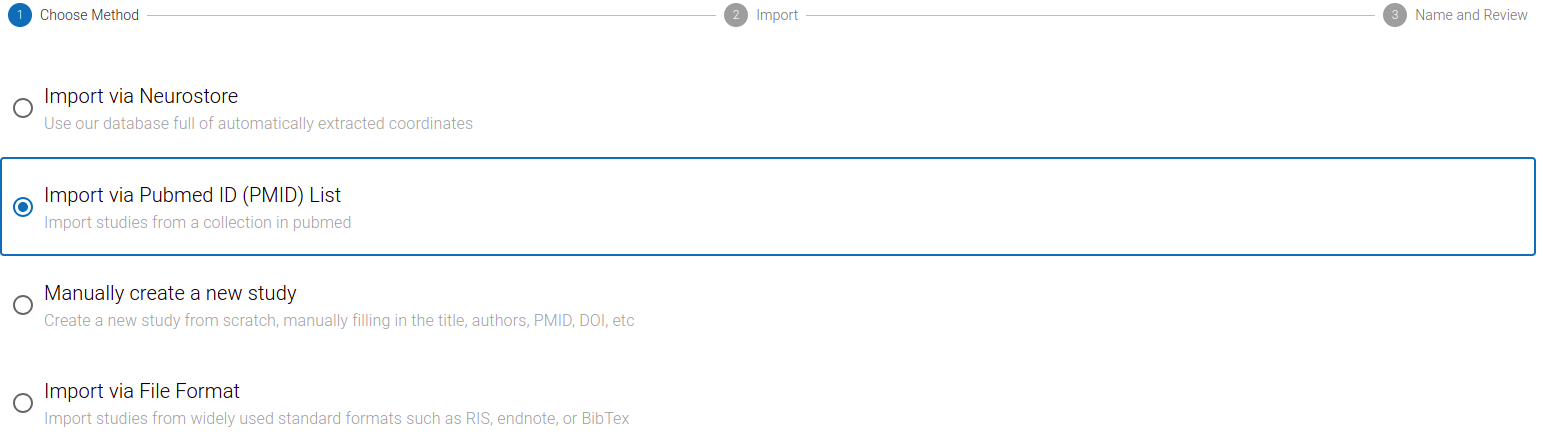
But first, we must add studies to our Project. Click the Import Studies button on the top right of the screen to open the import dialog.
From here you can:
- search for studies within the NeuroStore database—our curated collection that indexes over 30,000 pre-processed neuroimaging studies; or
- import from external sources, such as PubMed, a Sleuth file, or a citation manager file.
 .
.
Import via NeuroStore is simpler and faster, as these studies already exist in our system and have pre-extracted imaging data (e.g. coordinates). As a result, there will be fewer irrelevant studies to exclude, and less data extraction to complete.
However, searching other sources is often recommended for a comprehensive literature search, as a single source can never index all possible studies.
To replicate the Nicotine meta-analysis, we will replicate the author's PubMed search.
Searching NeuroStore is a valid option for a manual meta-analysis to balance rigor and efficiency. To learn more, see the Automated Meta-Analysis tutorial.
Searching PubMed
We can export any PubMed search result to file, and import that file into Neurosynth Compose using the PubMed import option. The importer expects a plain-text file with one PubMed ID (PMID) per line.
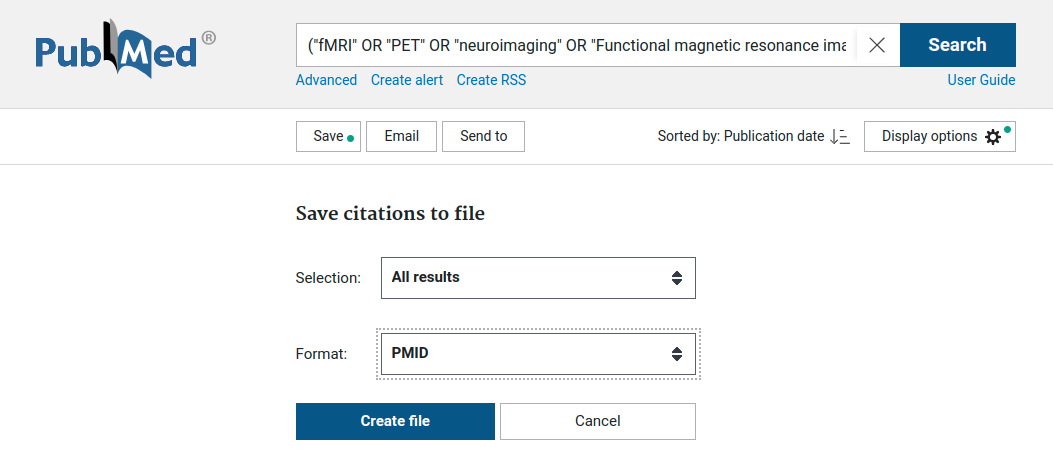
In this example, we perform the following search which in the PubMed search field:
("fMRI" OR "PET" OR "neuroimaging" OR "Functional magnetic resonance imaging" OR "functional MRI")
AND ("nicotine" OR "cigarette" OR "smok*" OR "DMXB-A")
This results in over 3,000 studies that are potentially relevant for this meta-analysis.
Next, we save the results to PMID format, with a PubMed ID on each line.
Reviewing 3,000 studies can take a long time! Only a small percentage of these studies will meet all inclusion criteria. For the sake of the tutorial, we provide a shortened list of PUBMED IDS.
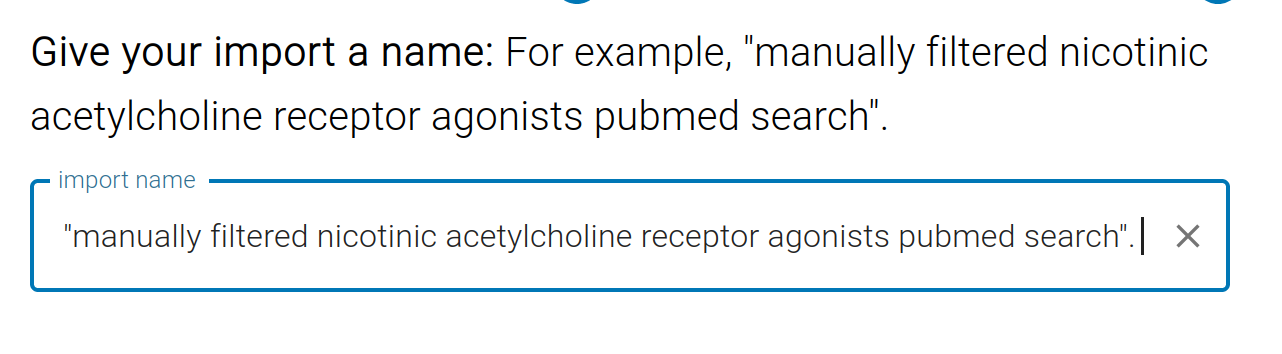
We can import this file into our Project by clicking Upload File or by copy/pasting the IDs into the box. Give this import a name for future reference. All studies imported from this search will be tagged with the search name. Tags are short labels that appear on each study (for example, the name of the PubMed search). You can use tags later as filters when you have multiple imports or want to quickly focus on a subset of studies.
Identification
All the imported studies are now visible in the first column of our PRISMA curation board.
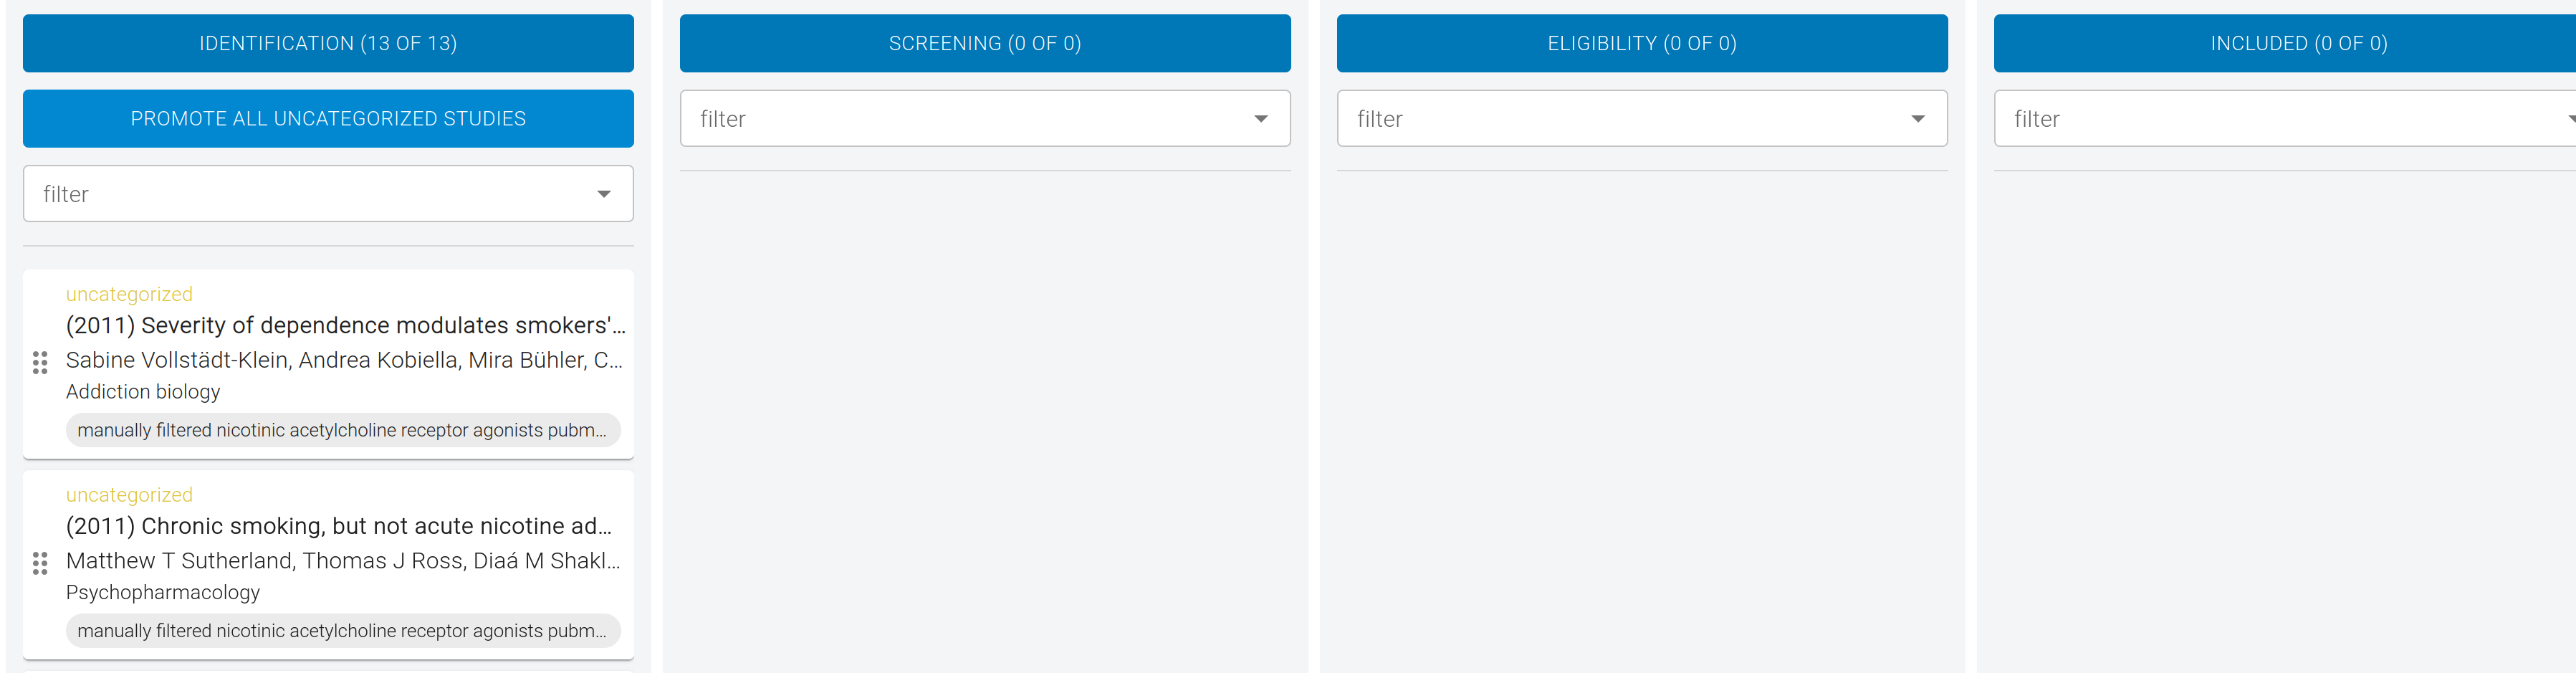
The purpose Identification is to find duplicate studies, which is common when importing from multiple sources. Neurosynth Compose will automatically find potential duplicates (based on the Title, DOI, and PMID). However, you can also manually review studies to identify any duplicates we might have missed.
To review studies, click on the Identification column header, or an individual study. For each study, you can choose to "Promote" it to the next phase, "Exclude" as a duplicate, or flag for later review. Click Promote to move a study from Identification into the Screening column.
To remain PRISMA compliant, you should only exclude studies for being a duplicate in the Identification step.
In this example, there are no duplicates. To quickly advance, click Promote All Uncategorized Studies under Identification.
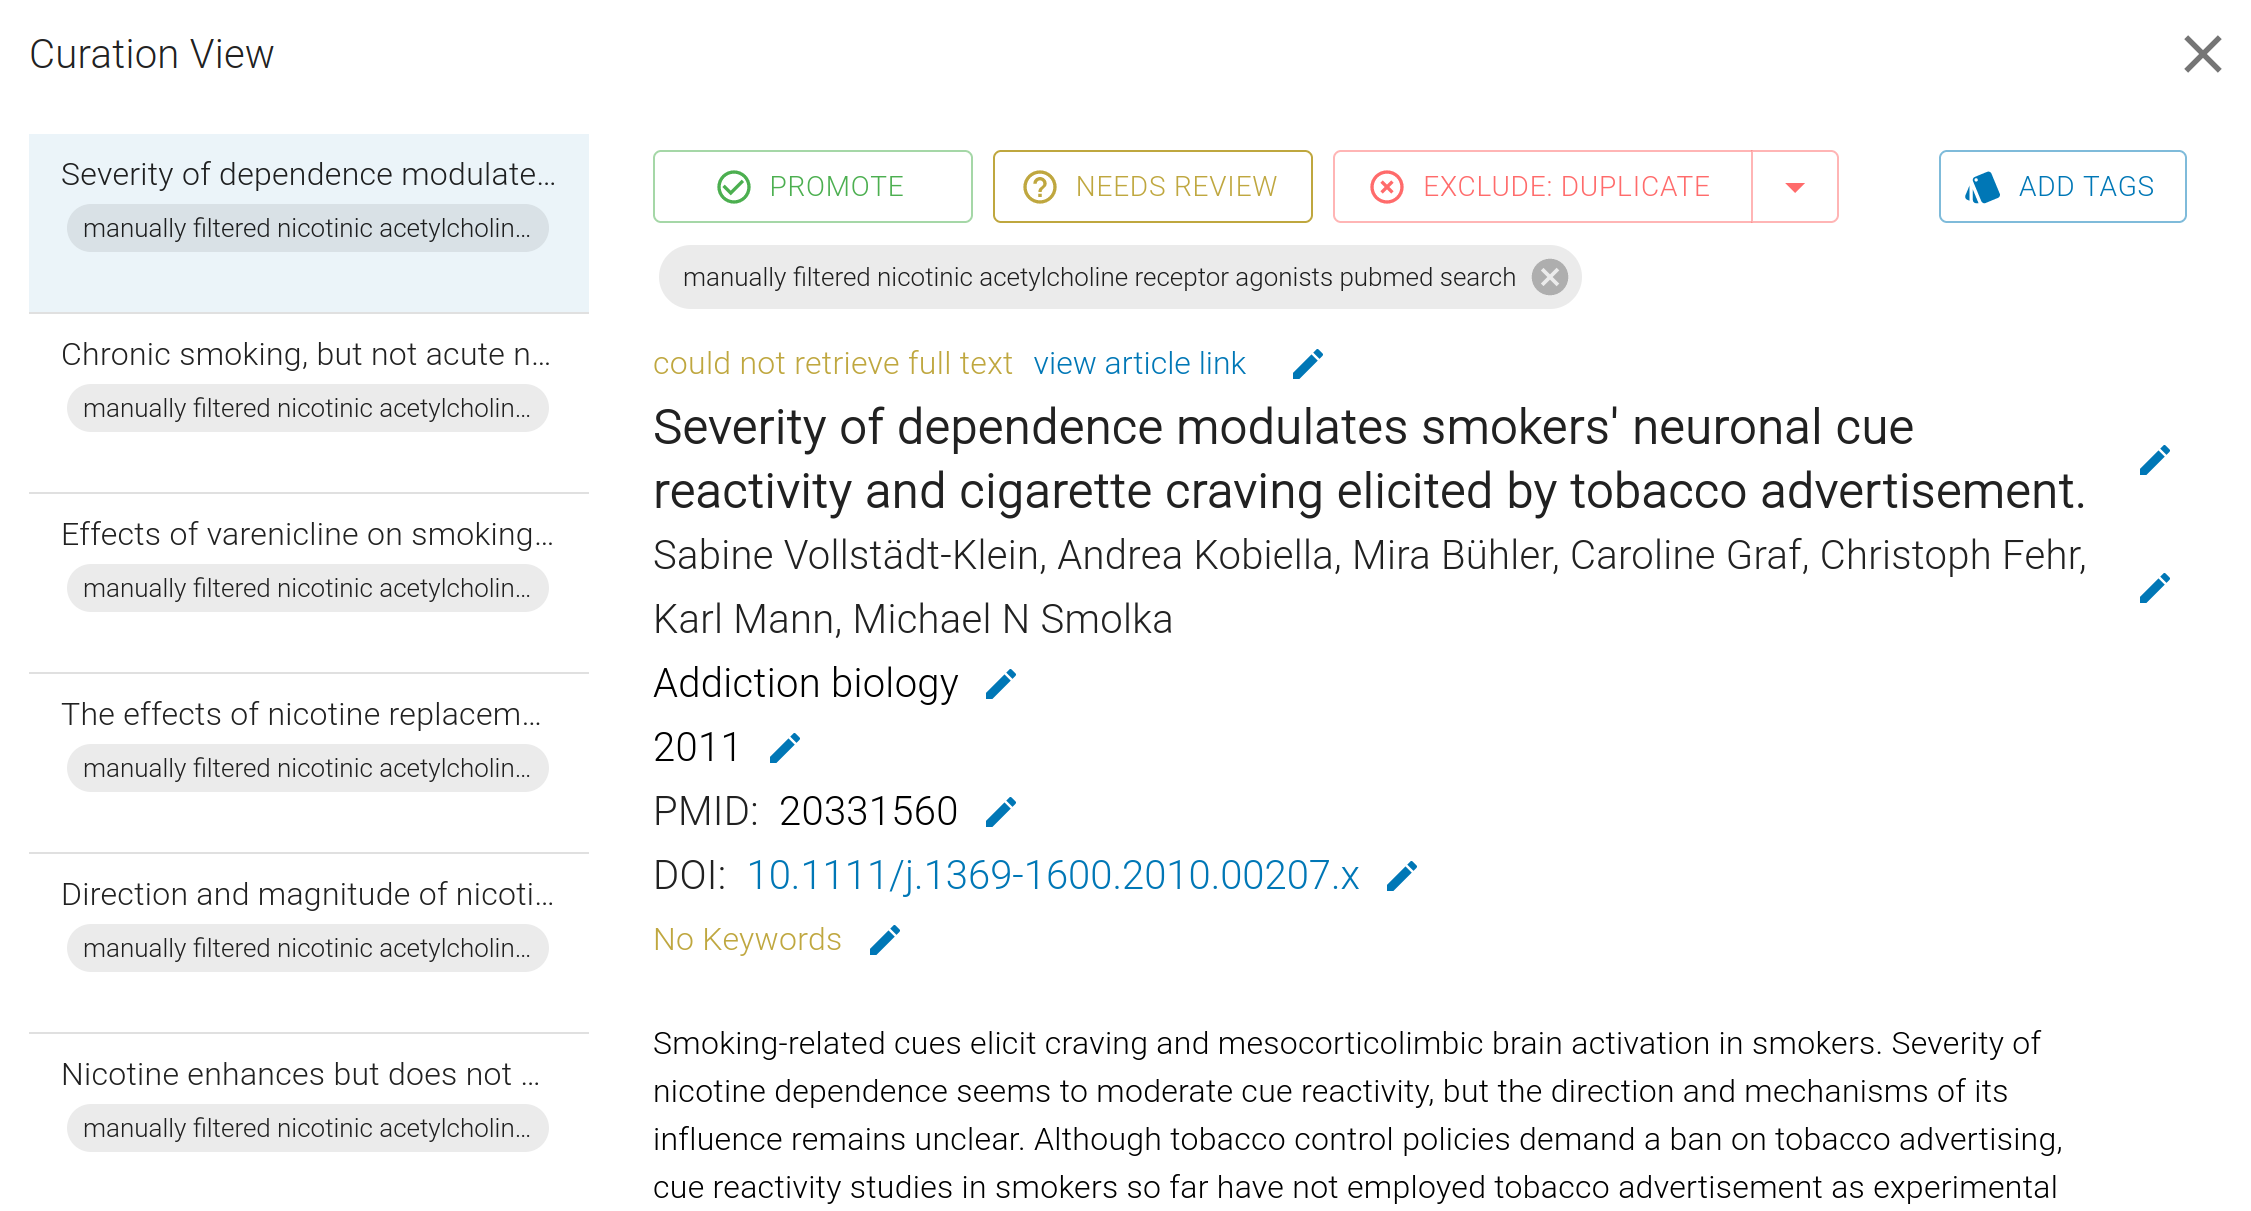
Screening
The goal of Screening is to determine if imported studies are relevant to your research question, based on the Title and Abstract of each.
To begin, click on the Screening column header from the main Curation board, or click an individual study. The interface is identical to the previous phase, except the default Exclusion reason is now irrelevant.
Within the review dialog, click Promote to move relevant studies into the Eligibility column, or choose Exclude: irrelevant when a study is not related to your research question.
Go ahead and review all 13 studies to determine if they are relevant to the topic of "Nicotine administration". Any studies that are not relevant will remain in this column and not advance.
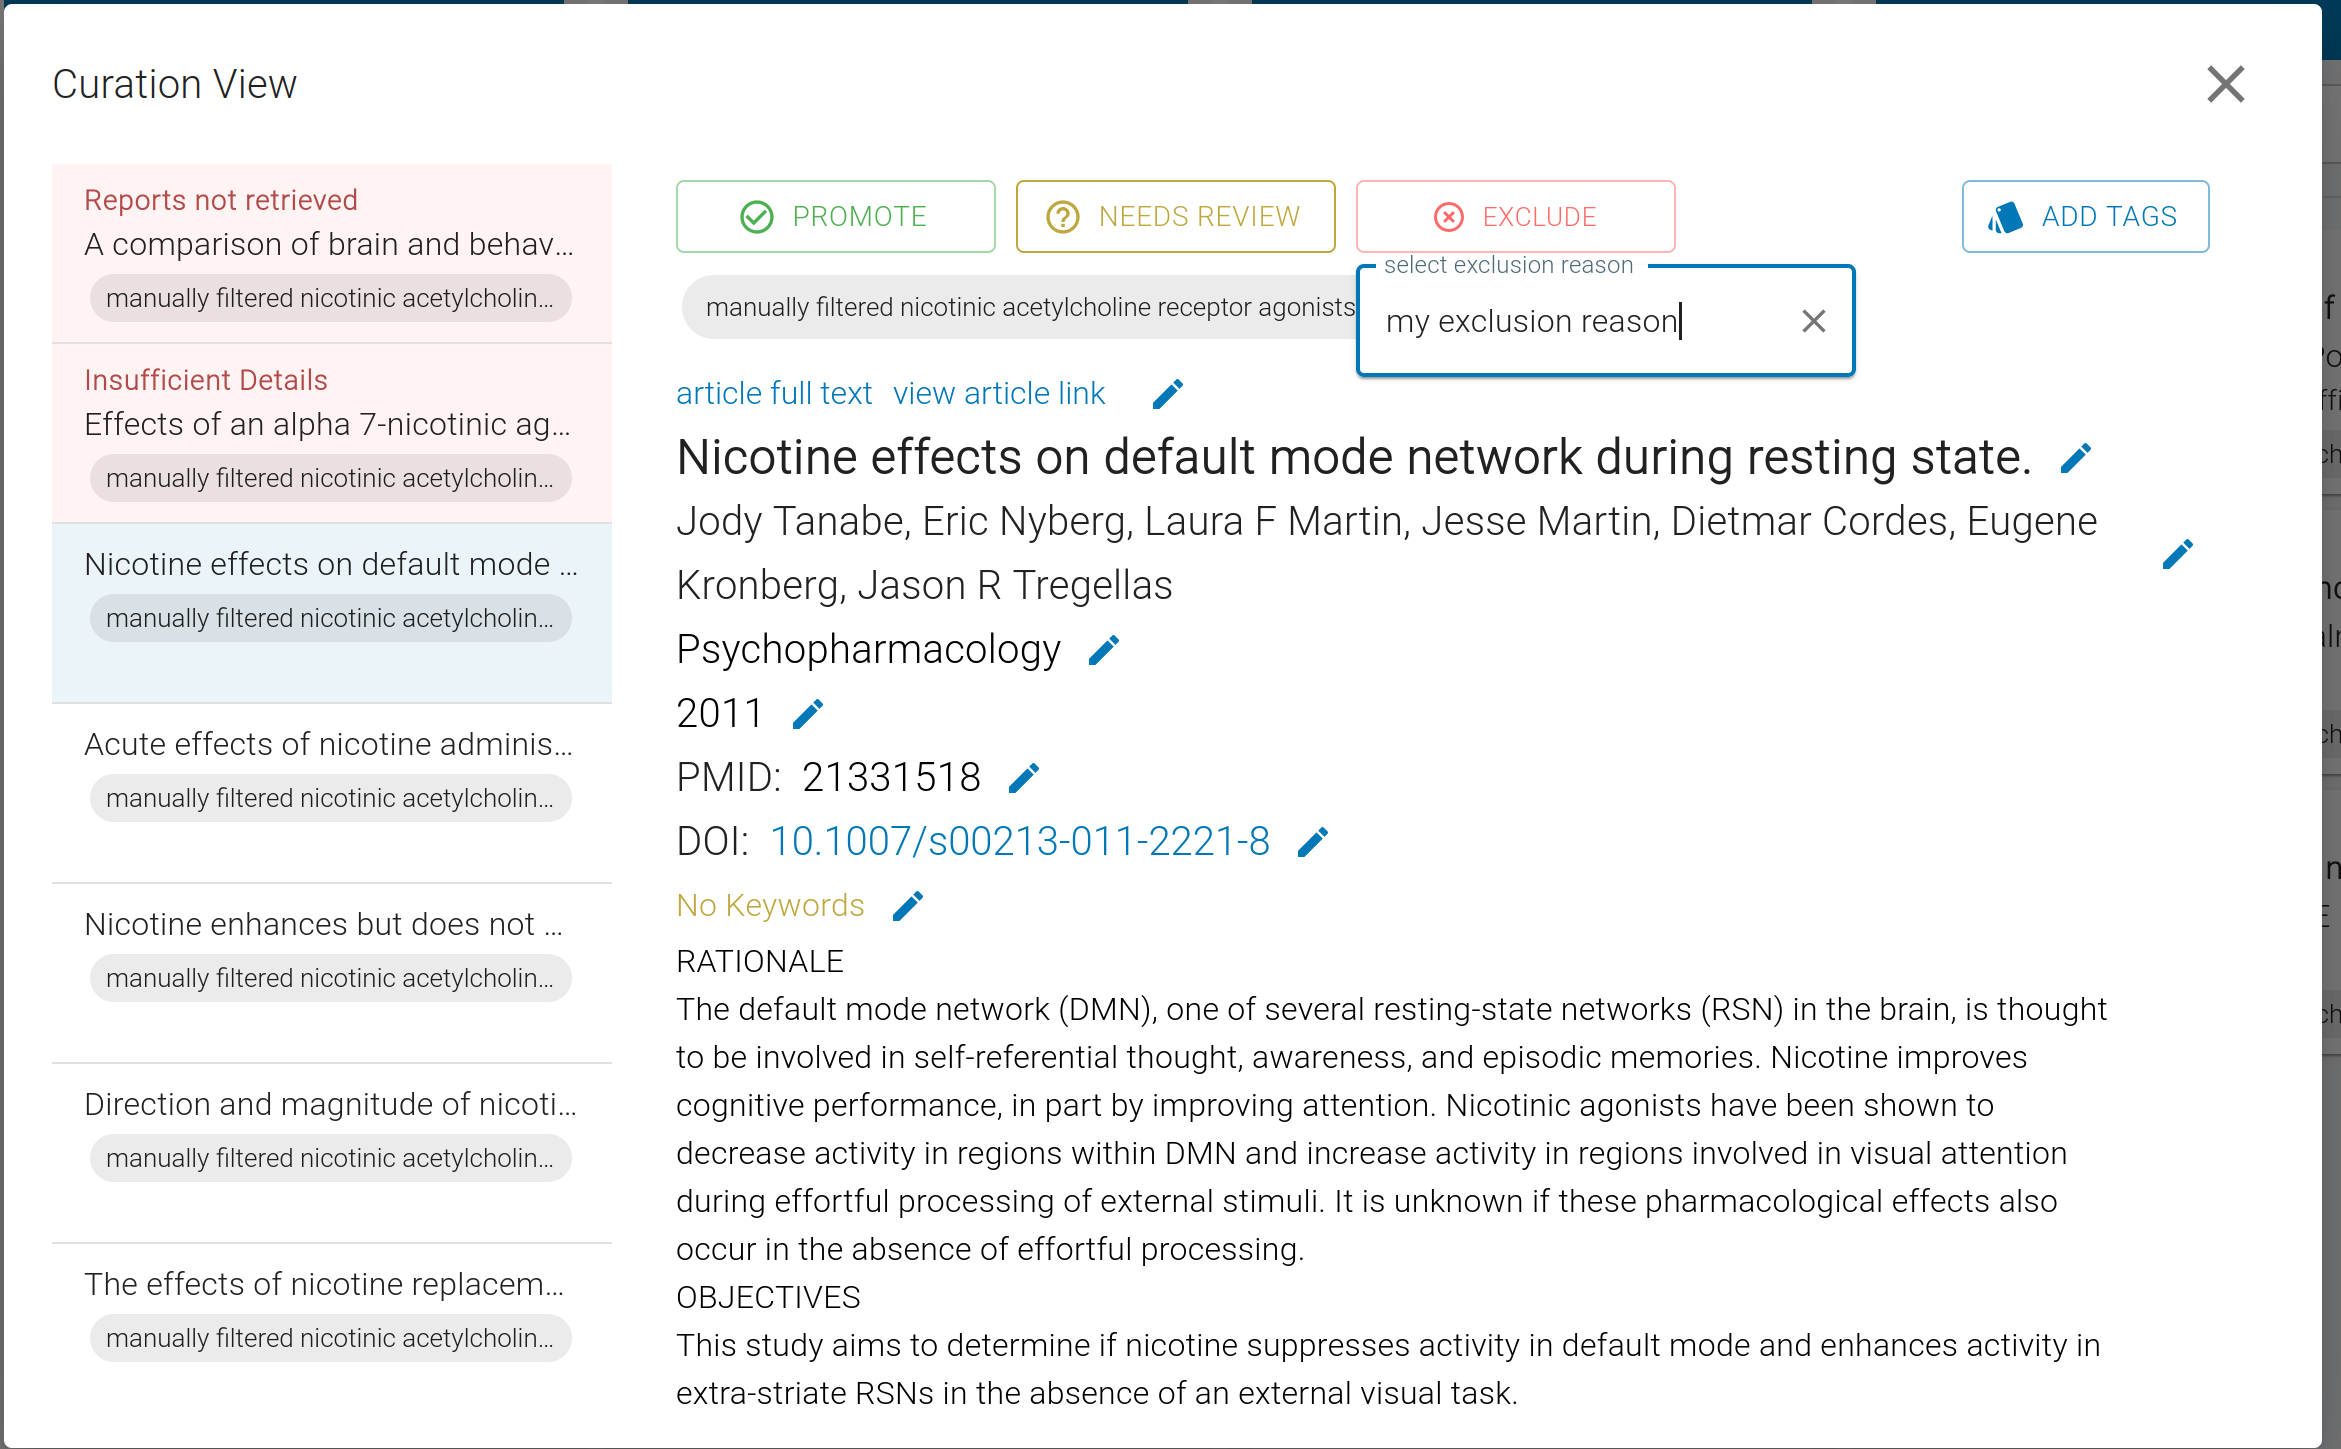
Eligibility
The goal Eligibility is to determine studies meet the eligibility criteria of your meta-analysis. You will need to read the full text to make this determination.
The eligibility criteria depends on your research question! This is where your expertise is most necessary, in order to create an interesting research question, and filter studies accordingly. The results of this step depends on the researcher, and there may be reasonable scientific disagreements.
To begin, click on the Eligibility column header, or a study, as before. Use Promote to advance eligible studies into the Included column, or select an appropriate Exclusion reason if they do not meet your criteria.
For this example, we will include studies that meet these criteria:
* fMRI or PET
* Reported brain activity in stereotaxic coordinates (Talairach or MNI space)
* Reported a set of coordinates (i.e., foci) from a within-subjects or between-subjects contrast assessing the effects of nAChR agonist administration (i.e., pharmacological administration or cigarette smoking) relative to a baseline condition (i.e., placebo administration or smoking-abstinence condition)
* Examined brain activity using a cognitive or affective task paradigm or at rest.
* Studies examining functional connectivity, brain morphology, or neurochemistry are excluded.
For this tutorial, go ahead and review all studies in this column, and Promote relevant studies to the next phase.
Given that this phase is more open-ended, there is no default Exclusion reason. We provide four default options for you, and you may define custom Exclusion reasons if you see fit.
For open source studies, we will link to the article full text (PDF). If not available, click "view article link" to view article's PubMed page, and access the full text using your credentials.
Included
Congratulations! Once you have reviewed all studies, you should have a set of studies that you want to include in your meta-analysis.
At this point, you can review this final list, and view a PRISMA diagram visually outlining your review process:
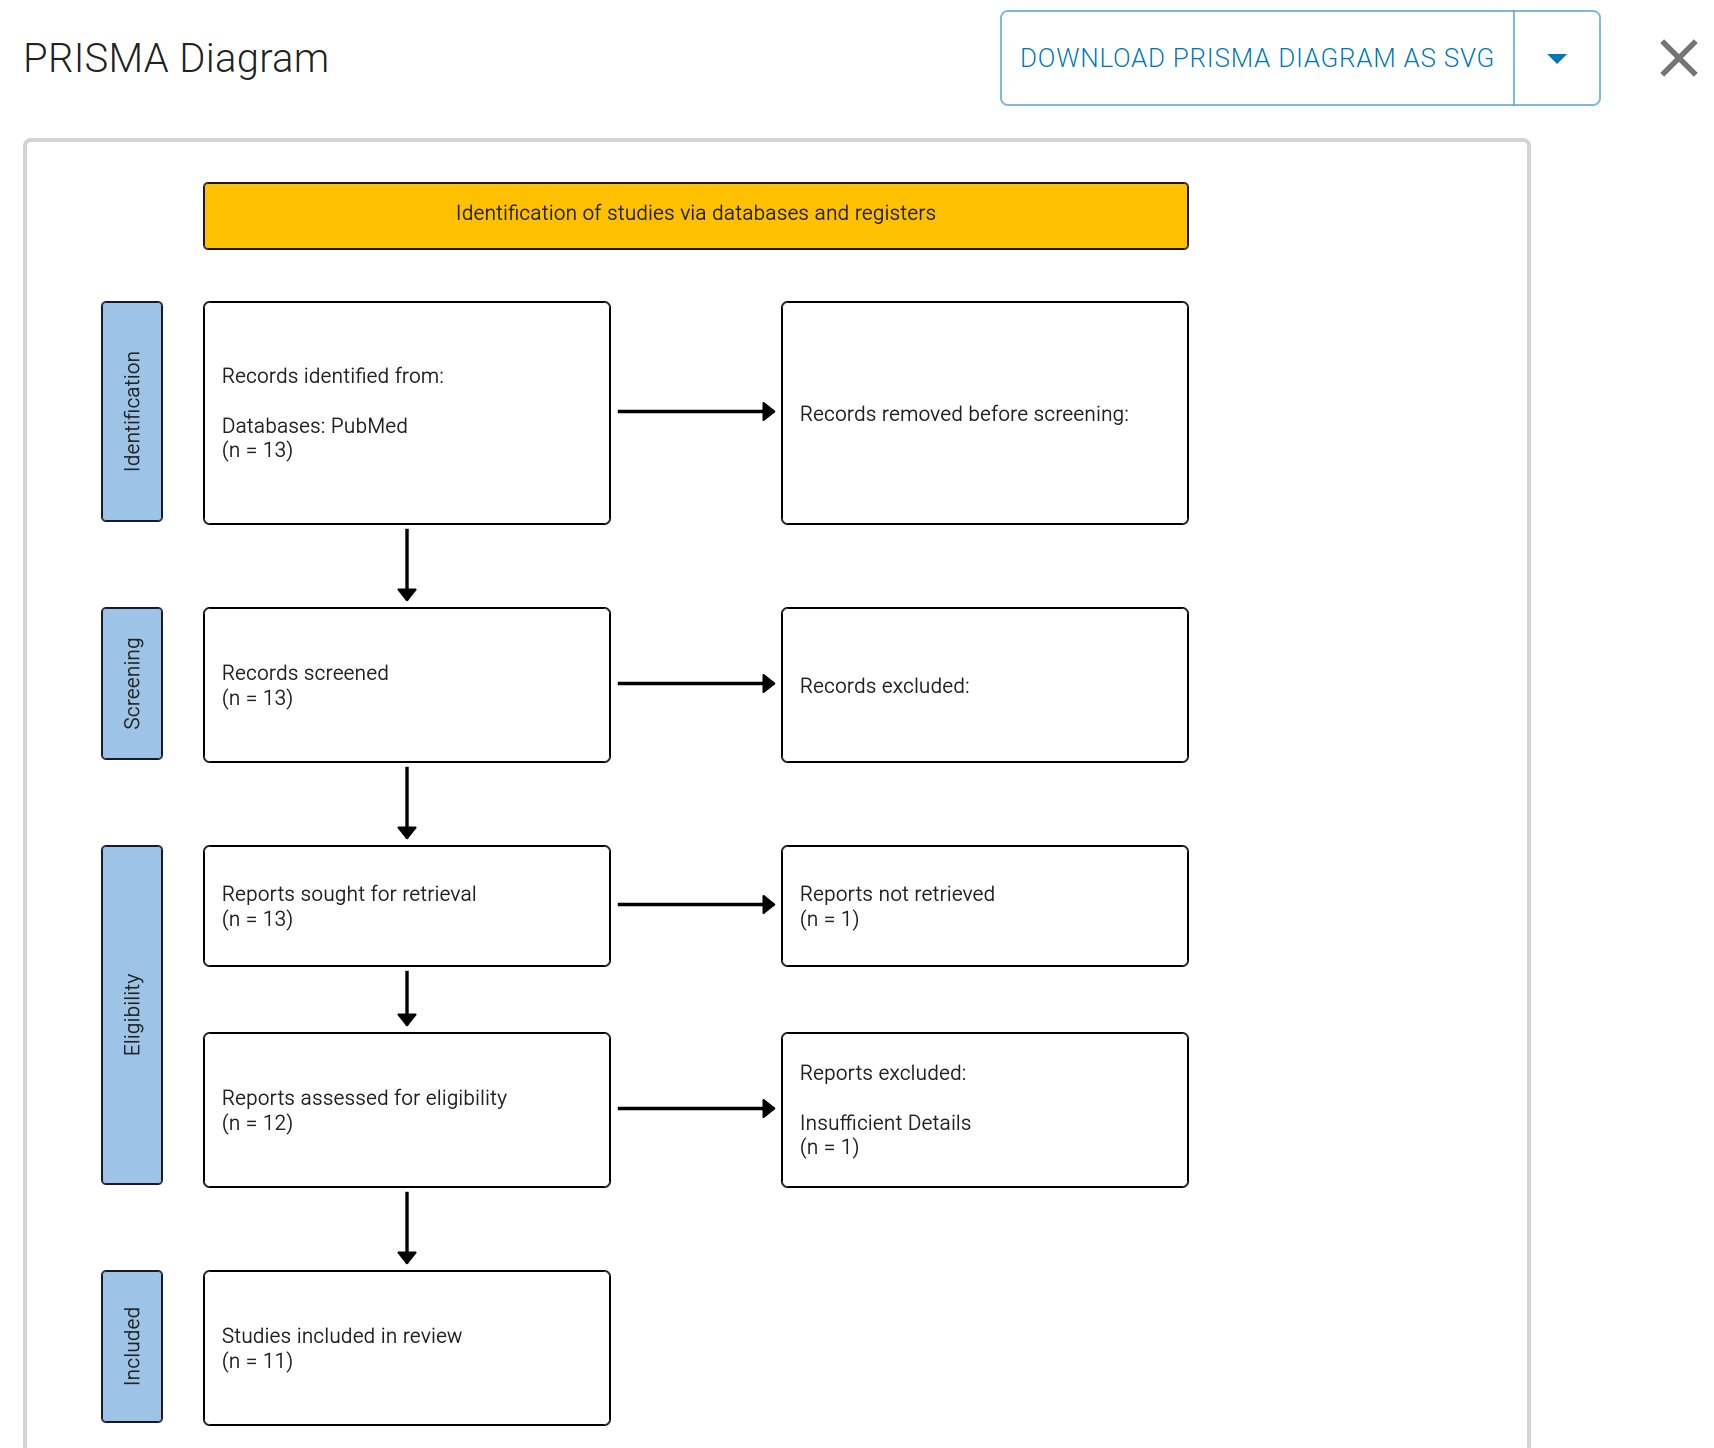
From this view you can also click Download PRISMA Diagram as SVG to save a high-resolution copy of the flow diagram for inclusion in manuscripts or presentations.
To finish Curation, and create a final StudySet, click Move on to Extraction at the top right.
Extract and Annotation
The goal of this phase is to extract data from the text of studies (such as coordinates) that will be used in the meta-analysis. You will also want to annotate relevant Study meta-data. Most commonly, for each Study you will designate which Analyses (i.e. Contrasts) to included in your meta-analysis.
Studies that are already indexed by NeuroStore will have automatically extracted data (such as coordinates) saving you a lot of time and effort. However, you may want to verify and improve this information.
Ingestion
But first, we must create a StudySet containing your studies!
During ingestion, Neurosynth Compose attempts to match each imported study to an existing record in the NeuroStore database. When a match is found, that existing Study is reused; when no match exists, a new Study is created and added to the newly created StudySet.
Studies in NeuroStore have multiple Versions, including those created by other users, as well as the original copy.
If you ingest a study that is already indexed in the database, we will match to the newest possible Version, by default. Ideally, this will be a Version that another user has already improved, saving you even more time!
You can switch Study Versions at anytime (including to the original automate copy) by clicking Switch Study Version at the bottom of Study's page. Any edits you make will automatically be saved as a new Version.
Editing studies
Once your StudySet is created, it's time to edit studies. You will see a list of your studies:
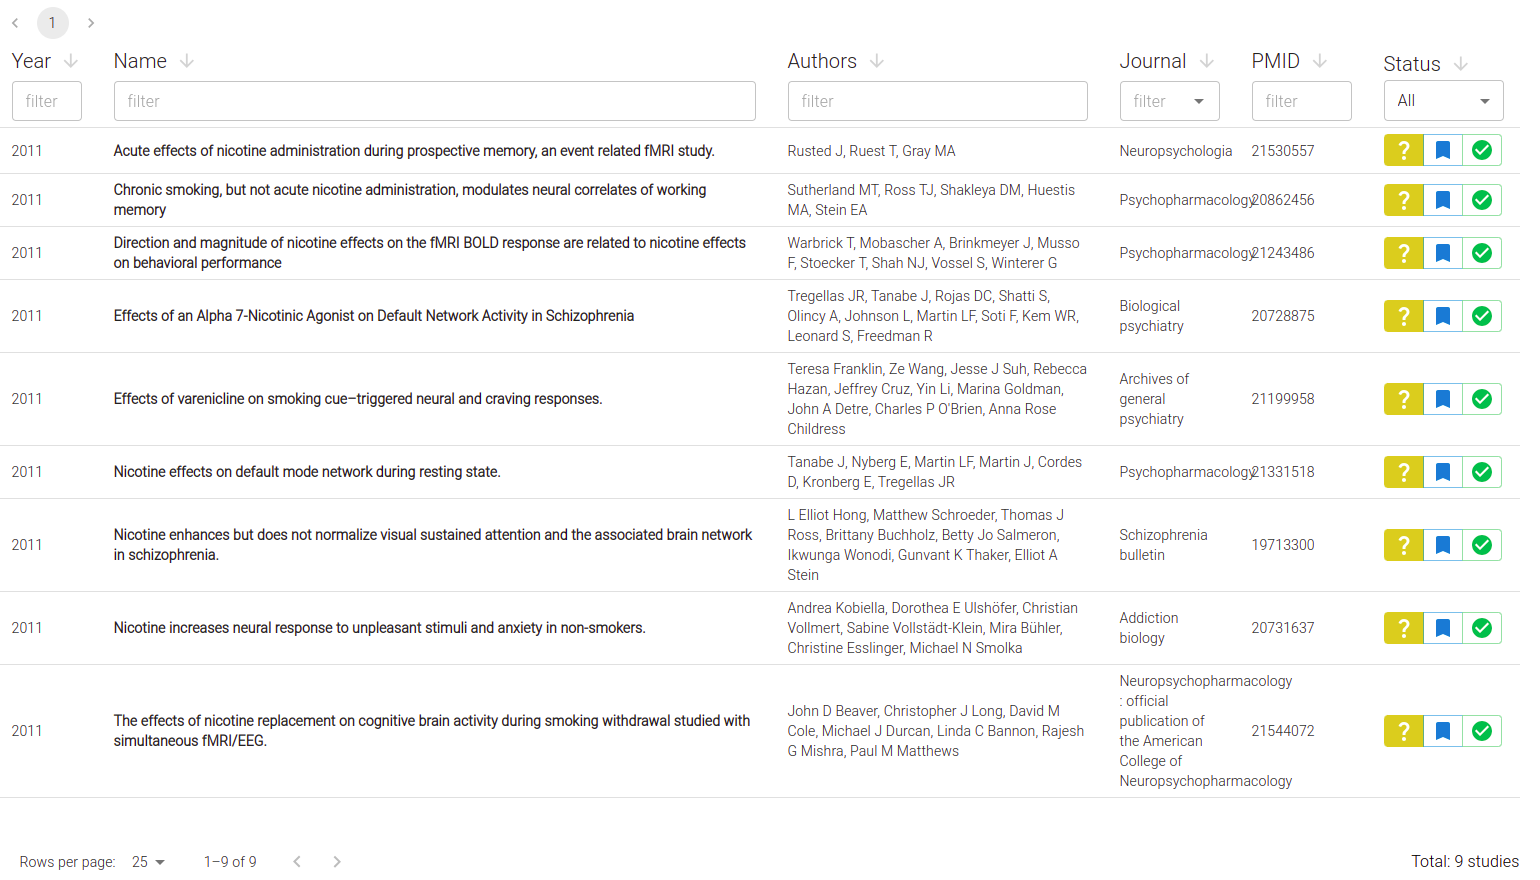
Click on any Study to edit:
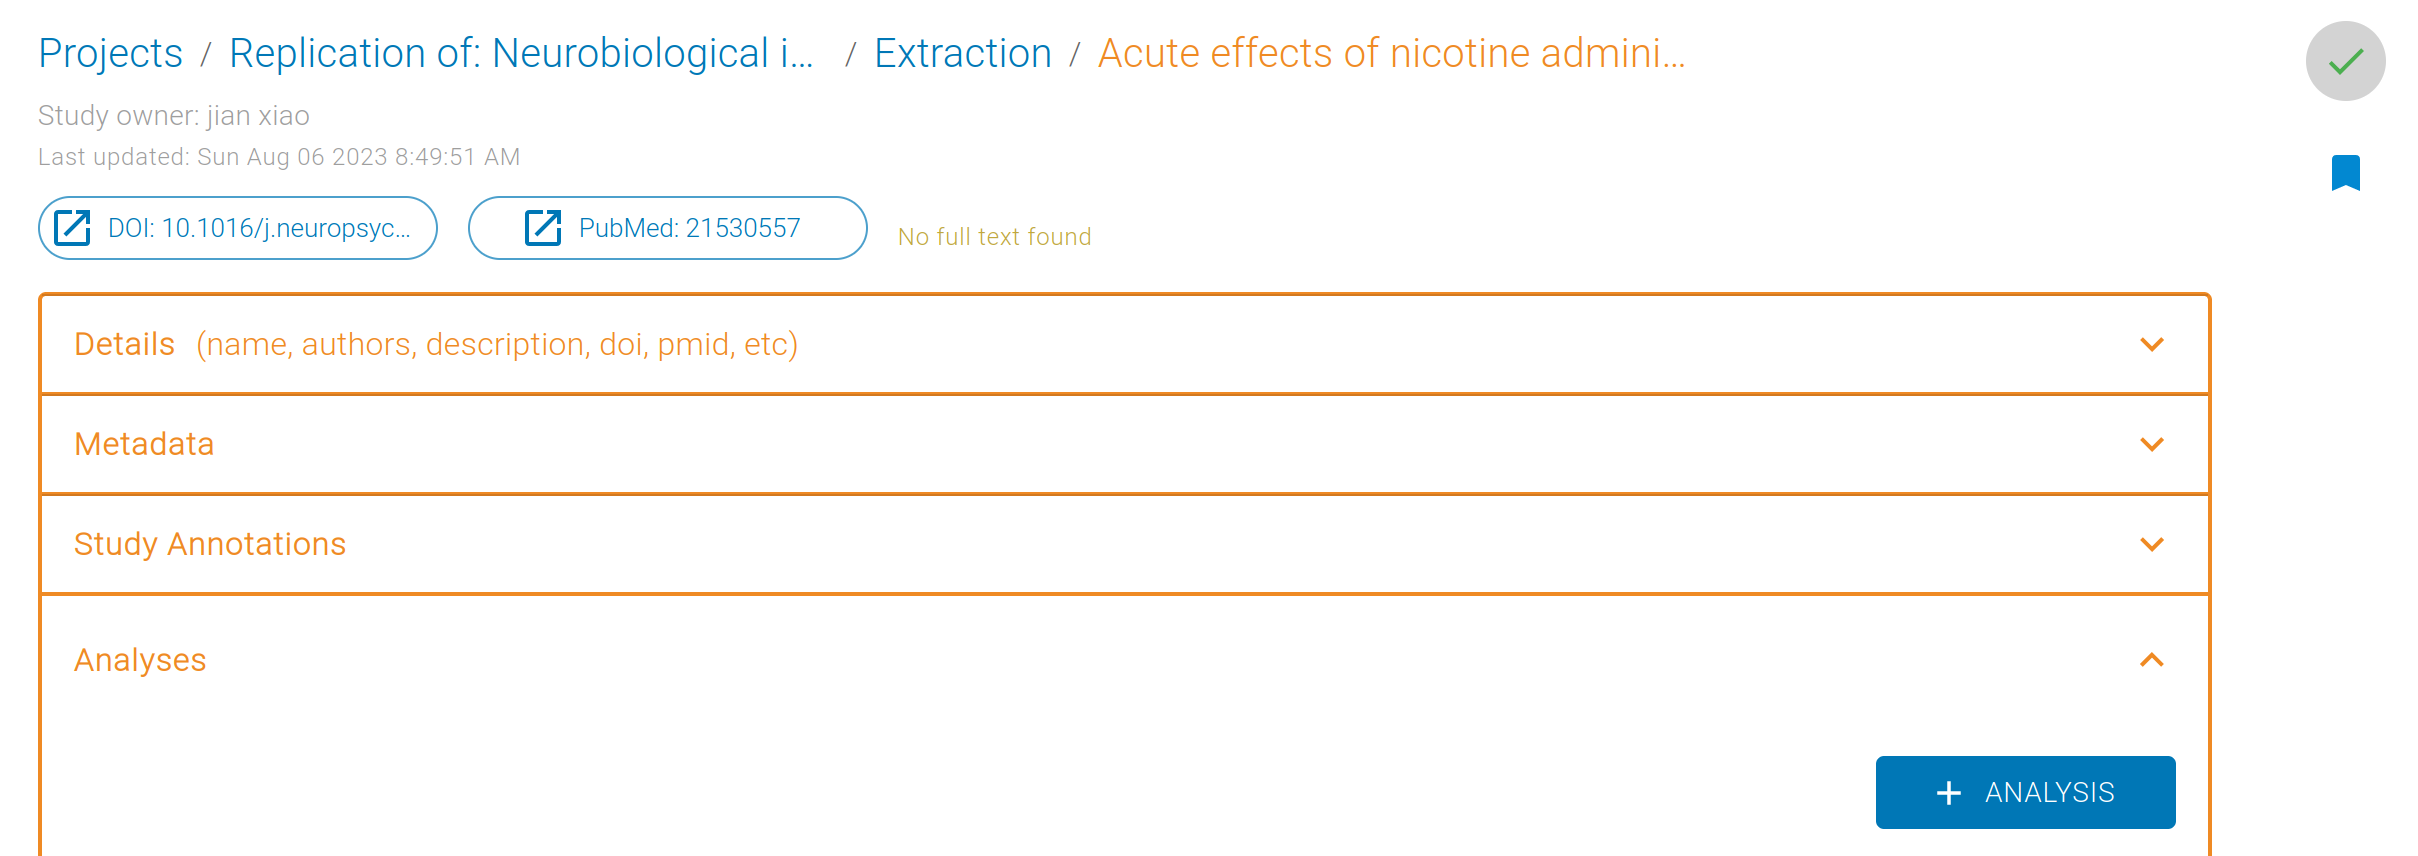
Analysis Data
Let's start by editing a Study's Analyses.
Analyses are groups of images or coordinates reported in a given study for a specific analysis. This is often referred to as "Contrasts", but we use the more general term "Analyses" to accommodate a wider range of fMRI models.
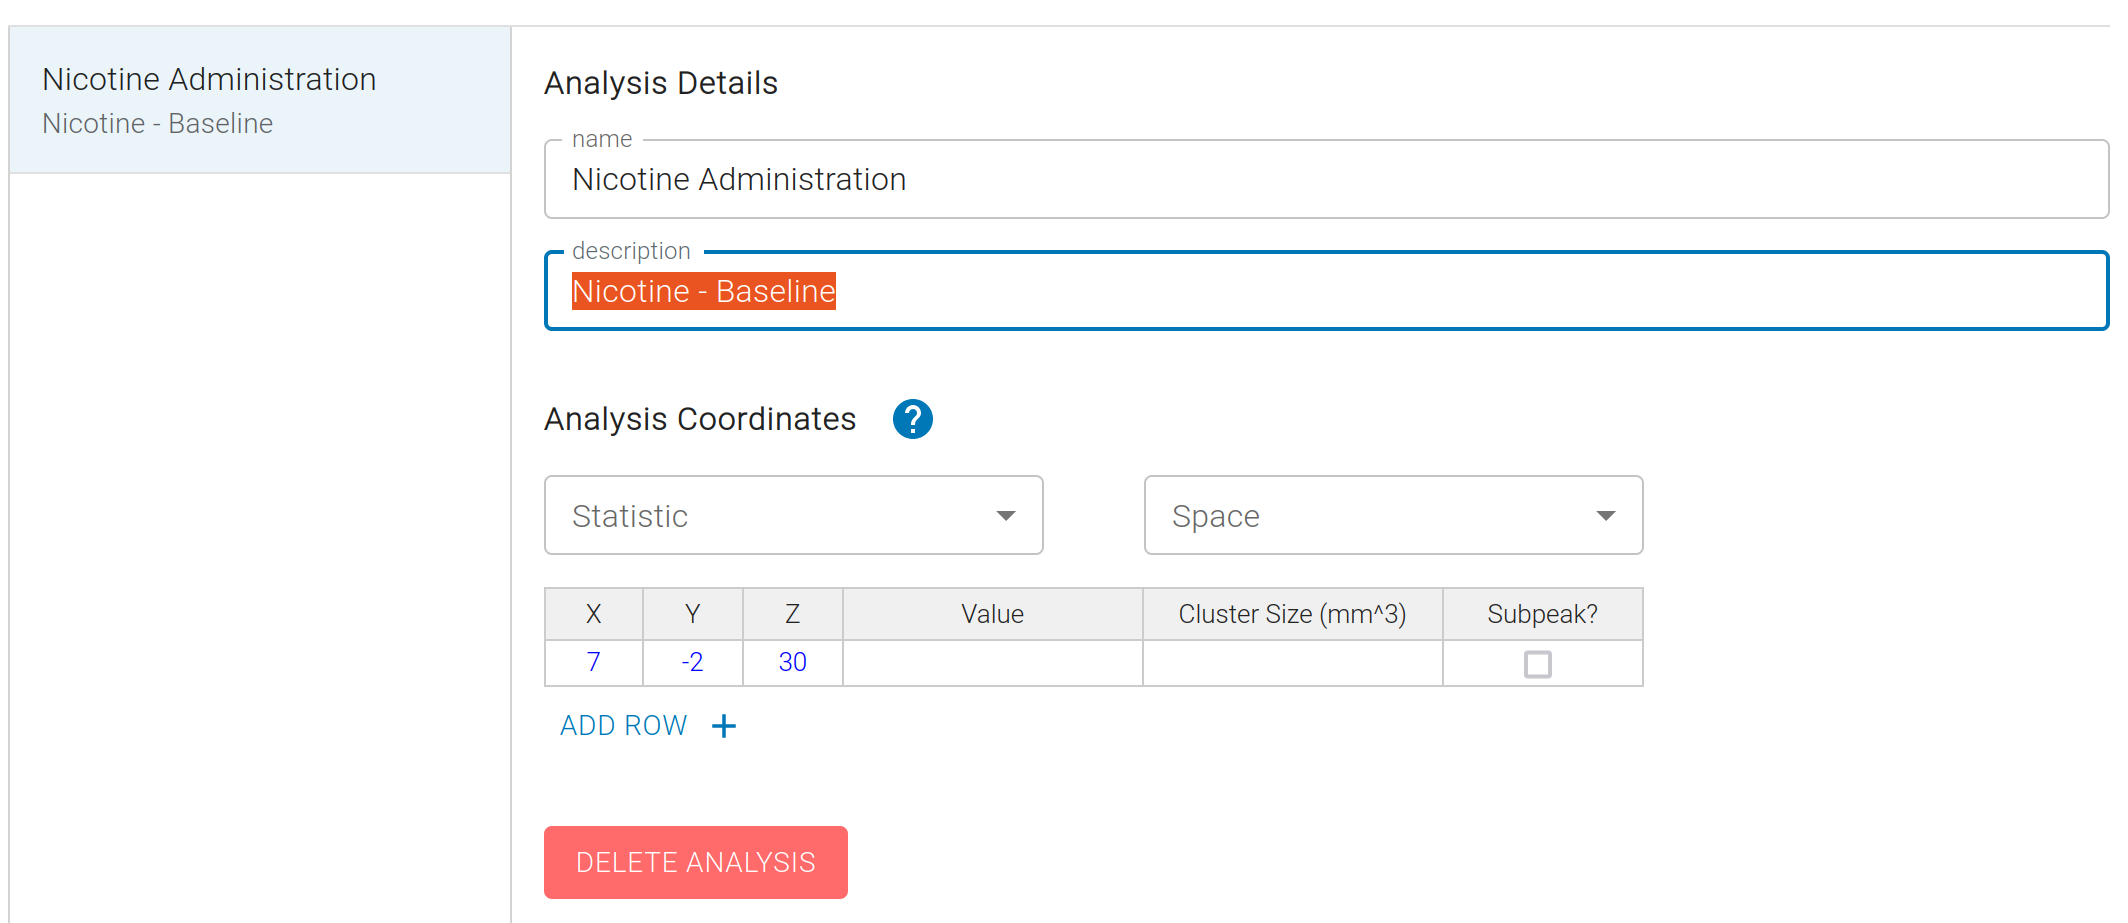
For new studies, we will not have any data, and it is necessary to manually enter these data from the text of a study. We can create a new Analysis for each group of Coordinates, and input the data from the text:
For each Analysis, locate the table of peak coordinates in the article, then add one row per coordinate (X, Y, Z) in the Analysis Coordinates table. Use the drop-down menus above the table to set the statistic type (e.g., Z or t value) and coordinate space (e.g., MNI or Talairach).
For studies already indexed by NeuroStore, we will already have pre-extracted Coordinates. You can use this same interface to verify and correct these data.
Automatically extracted coordinates can contain a number of errors. Mostly commonly, several distinct Analyses (i.e. contrasts), will get grouped into a single Analyses. You will want to create new Analyses to split up the Coordinates into distinct units.
Another common error is that Analyses are duplicated, meaning you may want to delete extra Analyses.
You can copy and paste coordinates from Microsoft Excel or Google Sheets.
Annotations
A key goal of the Extraction phase, is to add Annotations that can help us distinguish Analyses, and include/exclude specific Analyses from a meta-analysis. Annotations are simply columns of data with a value for all Analyses within a StudySet.
Annotations can be explained as a way to categorize analyses within each study. For example, they can be categorized by task (e.g., Stroop, N-back, etc.), by modality (e.g., fMRI, PET, etc.), or by any other category that you want to use to filter the analyses. See the Glossary entry on Annotations for additional background.
By default, a single Annotation called "included" is created, which includes all Analyses. You can modify this Annotation to select the relevant Analyses of interest to your research question
For this replication, we are interested in the effects of nAChR agonists on the brain, which can either be excitatory or inhibitory, so we add both an “activation” and “deactivation” column.
First create an Annotation. From the main Extraction page, click "View Annotations" on the top right. Here you can view all annotations and the value for each Analyses, as well as create new Annotations. You can choose the data type of each column as either a Number, String, or Boolean. Selected a Boolean data type for the “activation” and “deactivation” columns, which will allow you to filter the analyses by whether they are excitatory or inhibitory. By default you will have an “include” column to help get you started.
Below, I am creating a new Annotation for "deactivations"
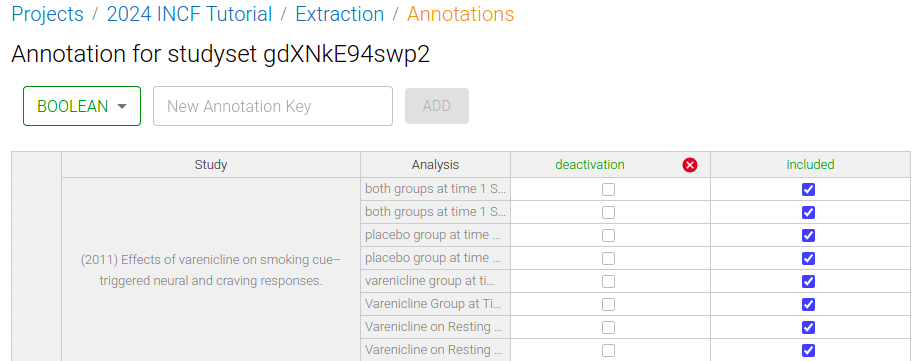
Now, when I look at a study, I can edit the value for Analyses, assigning each group of coordinates as "activations" or "deactivations":

Meta-analysis specification
You are finally ready to specify a meta-analysis! From the Project page, click Proceed to Meta-Analysis (top right of the StudySet card; see screenshot below) to open the specification wizard.
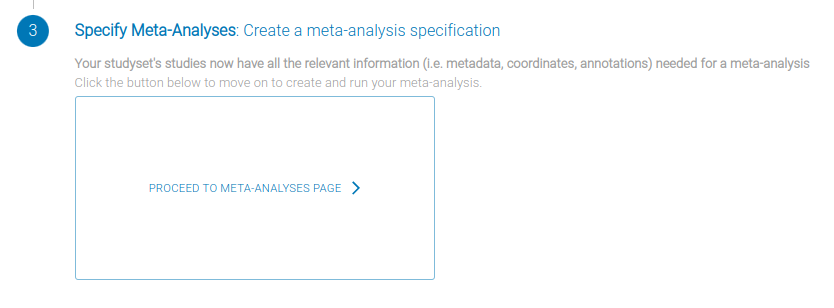
After clicking "+ Meta-Analysis Specification", you'll see the following dialog:
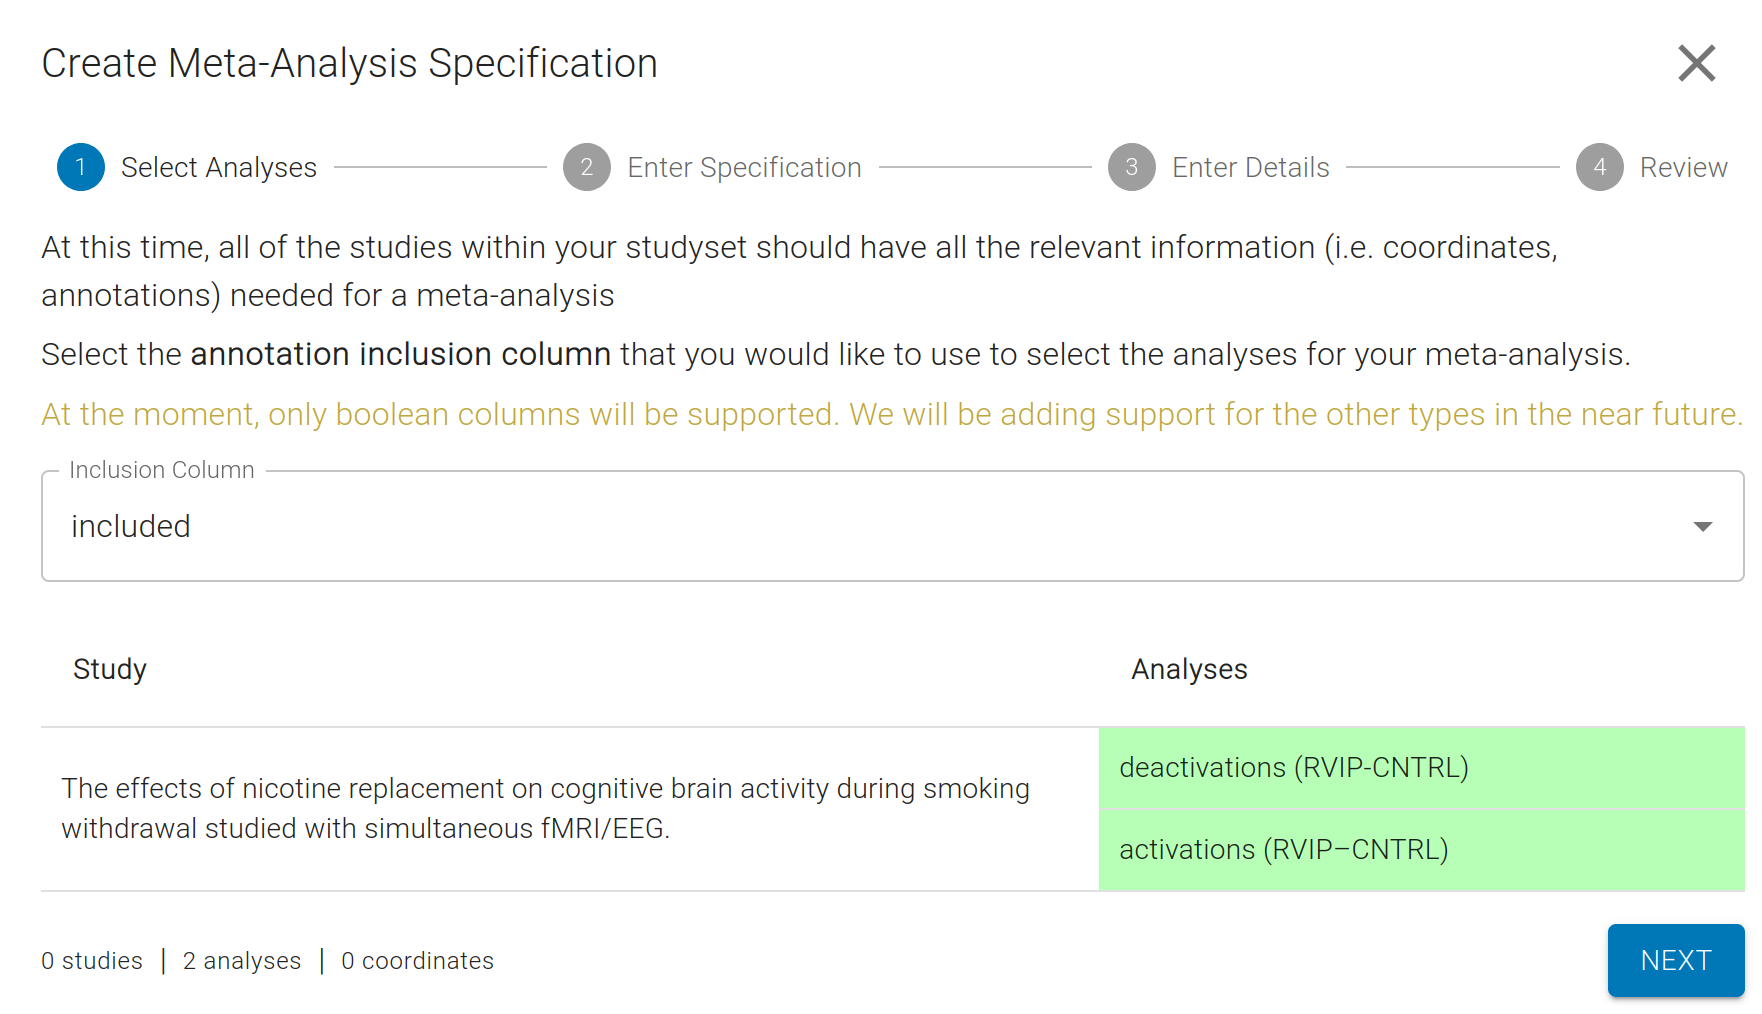
For each Meta-Analysis, you will select an Annotation to filter the Analyses to include. Remember, by default, the "included" column will be created and include all Analyses.
Next, you will select a meta-analysis Algorithm and Corrector:
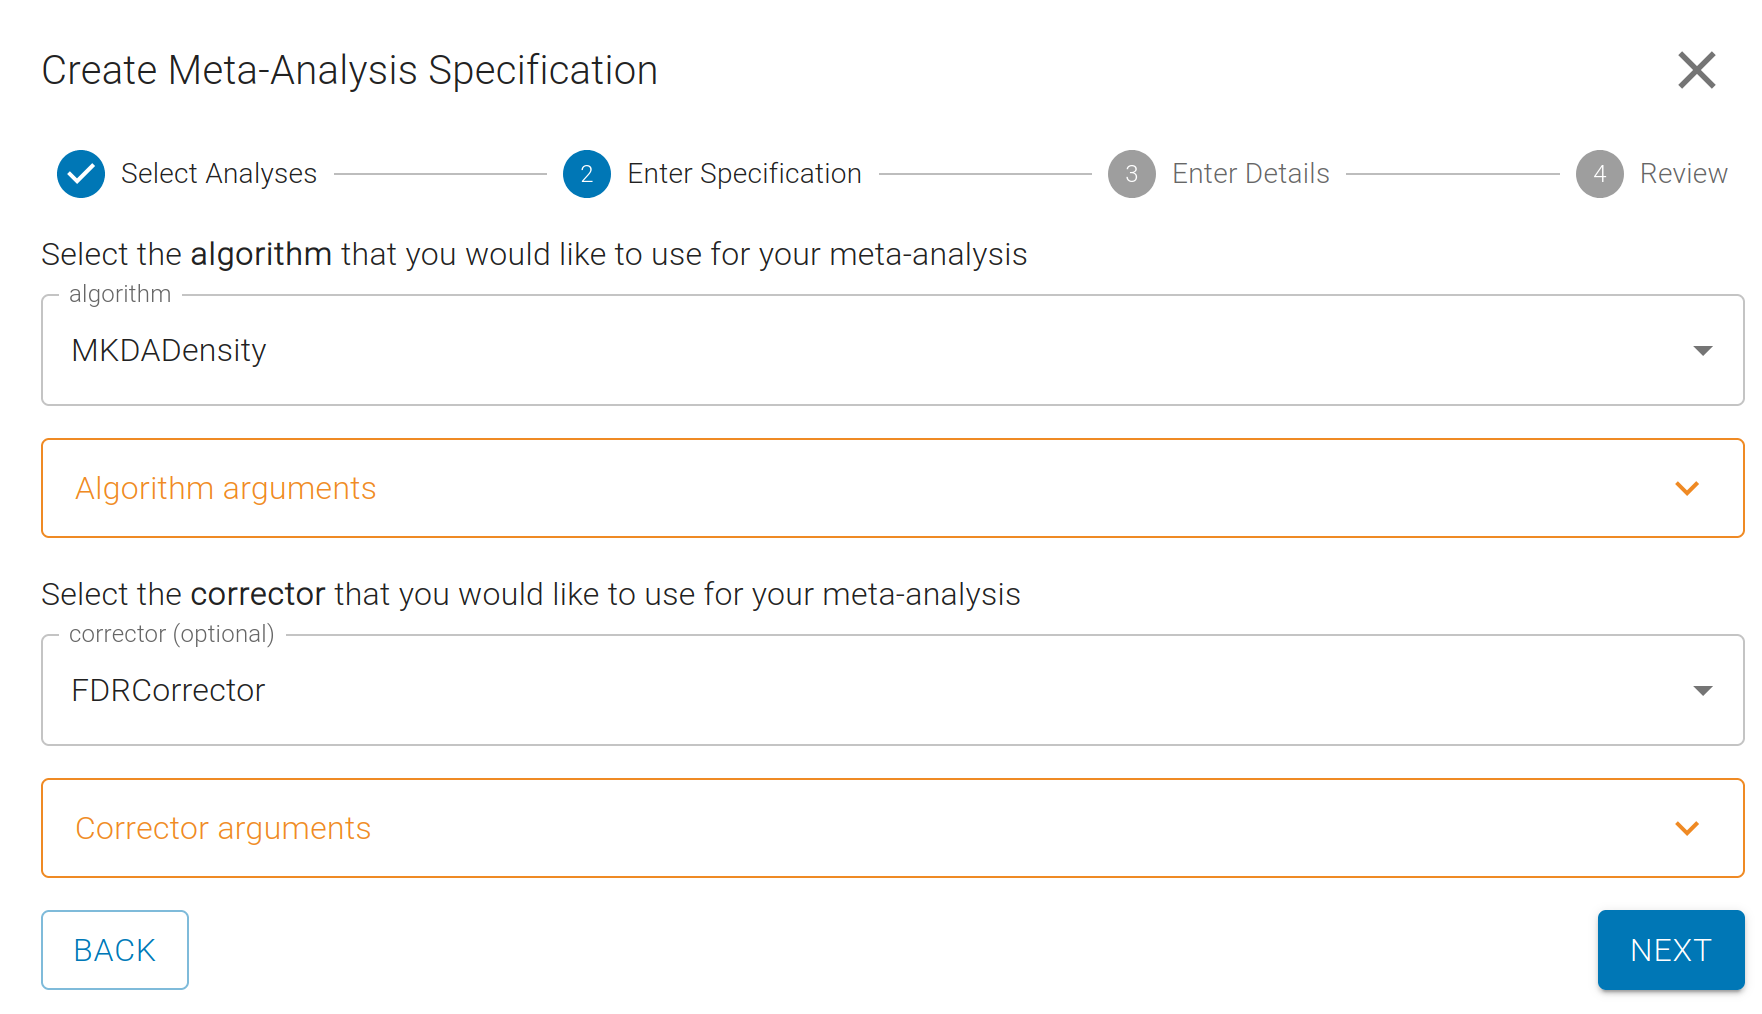
A variety of common meta-analysis algorithms such as "ALE" and "MKDA" are available, as well as two strategies for controlling for multiple comparisons: FDR (false detection rate) and FWE (family wise error).
For this example, we'll choose "MKDADensity" and and "FDRCorrection". You can modify the parameters for each, if you want, but we provide sane defaults for all.
Learn more about meta-analysis algorithms in the NiMARE Documentation
Next, you'll give your meta-analysis a name, and review the details of your specification.

You can define multiple Meta-Analysis specifications in a Project, paired to the same StudySet
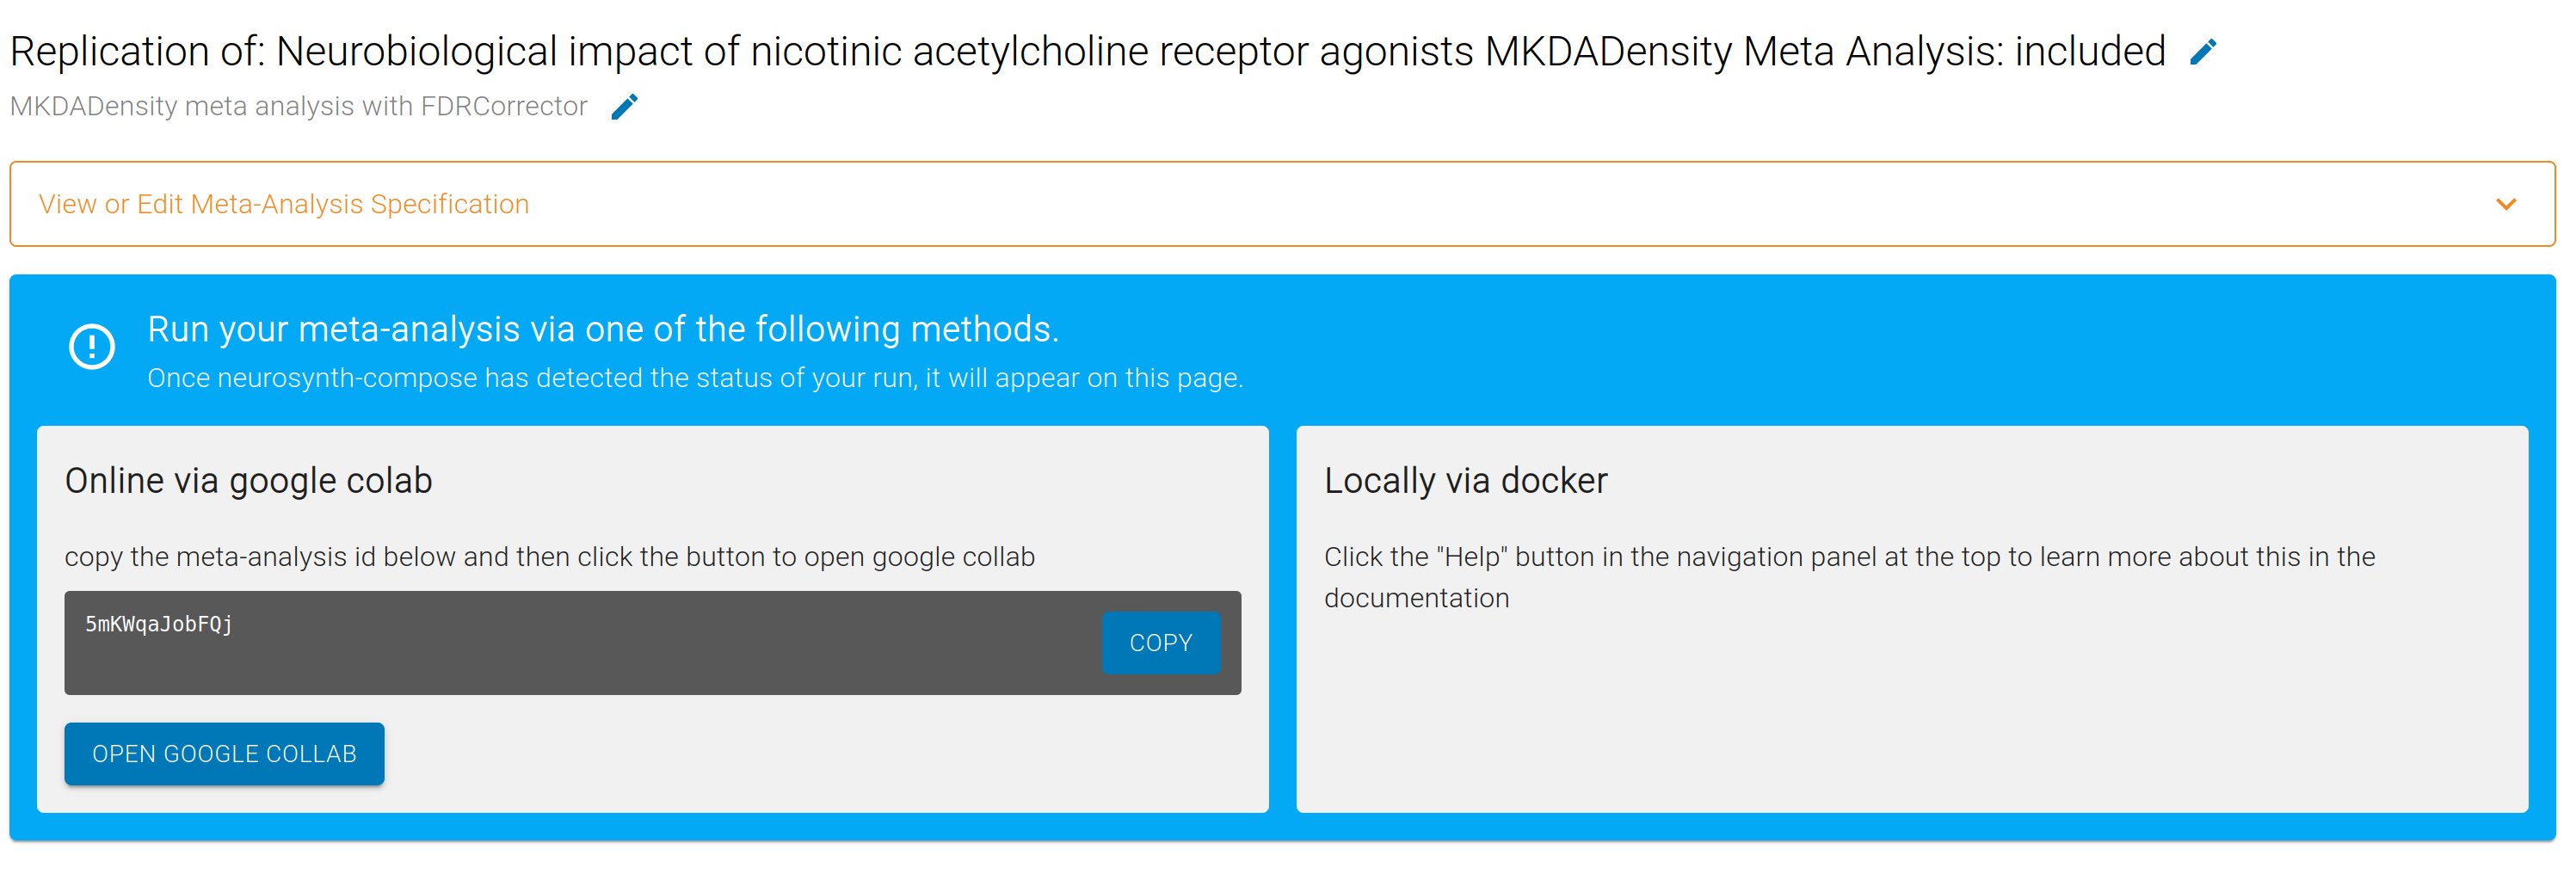
Run your meta-analysis!
Congratulations! You now have a Meta-Analysis specification that is ready to run.
You can execute your Meta-Analysis for free in the cloud on Google Colab by copying the unique meta-analysis id and pasting it into our Google Colab notebook.
Once your analysis has finished, Neurosynth Compose will link to a public NeuroVault collection containing the resulting statistical maps. You can open this collection to visually inspect thresholded and unthresholded images, share results with collaborators, and download images for follow-up or exploratory analyses.